This guide walks you through creating and deploying a branded link shortener using Cloudflare Workers and KV — exactly as it was built in practice.
Live public demo (landing page only – no login shown)
Visit live landing page → links.diyregistry.comFeatures
- 301 permanent redirects
- Custom slugs (e.g. links.diyregistry.com/yt → youtube.com)
- Protected admin dashboard with create/delete
- Beautiful dark-mode UI using Pico CSS (CDN)
- Password protection via KV-stored token
- Zero external dependencies • Free tier compatible
Prerequisites
- Cloudflare account (free tier is sufficient)
- Wrangler CLI installed (
npm install -g wrangler) - Logged in via
wrangler login
Create a new Worker project
npx wrangler@latest init my-link-shortener --type=hello-world
cd my-link-shortener
Choose JavaScript when prompted (not TypeScript).
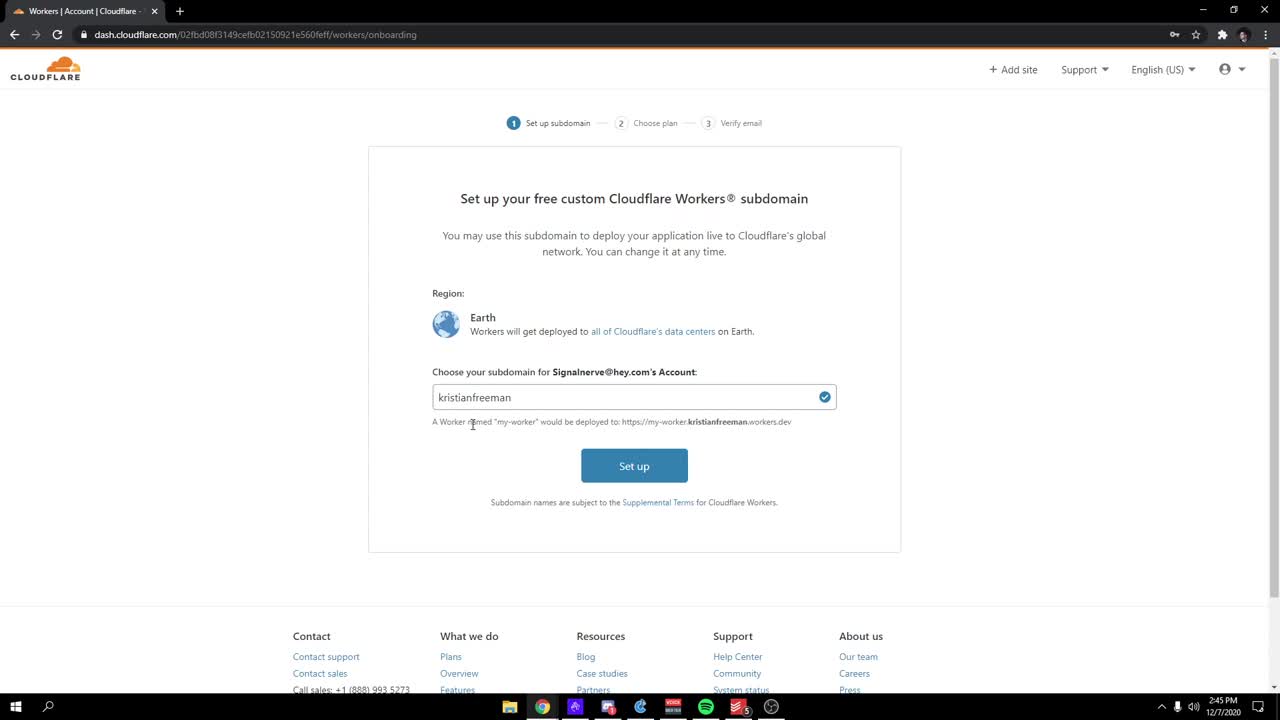
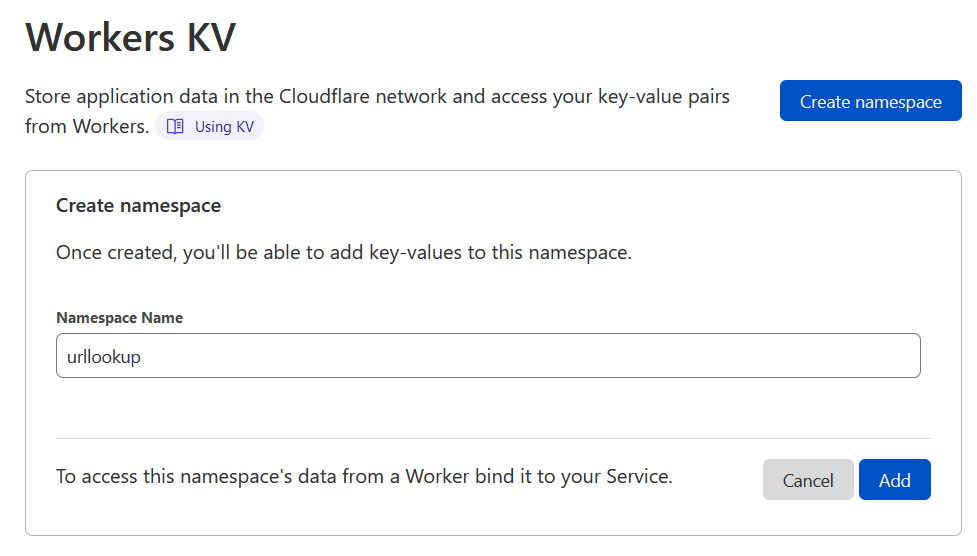
Create a KV namespace
In the Cloudflare dashboard → Workers & Pages → KV → Create namespace
Name it something like short-links.
After creation, copy the Namespace ID.

Configure wrangler.toml
name = "my-link-shortener"
main = "src/index.js"
compatibility_date = "2025-10-01"

kv_namespaces = [
  { binding = "LINKS", id = "YOUR_NAMESPACE_ID_HERE" }  # ← your Namespace ID
]
Replace YOUR_NAMESPACE_ID_HERE with the actual ID from step 2.
Set the admin password (secret token)
# Replace with your own strong password
wrangler kv key put admin-token "YourStrongPasswordHere!" --binding LINKS --remote
Use --remote to write to the live Cloudflare KV (not just local).

Add KV binding in dashboard (if needed)
In the Worker → Settings → Bindings → KV Namespace Bindings → Add binding:
- Variable name:
LINKS - KV namespace: select your created namespace

Replace src/index.js with the final code & Deploy
npx wrangler deployOr paste the full code into Quick Edit and click Deploy in the dashboard.

Using it
Admin Login
Go to /admin → enter your token
Dashboard & Links
Create/view/delete short links

Optional Next Steps
- Add a custom domain via Workers → Triggers → Routes
- Enable analytics by incrementing counters in KV
- Add link expiration or password-protected links
- Put the project in a GitHub repo for version control
Built with Cloudflare Workers + KV • 2026
Happy shortening! • Workers Docs
# Custom Link Shortener – Cloudflare Workers + KV
A minimal, fast, zero-dependency URL shortener built with Cloudflare Workers and KV storage.
**Live public demo (landing page only – no login shown):**
→ [https://links.diyregistry.com](https://links.diyregistry.com)
## Features
- 301 permanent redirects
- Custom slugs (e.g. `links.diyregistry.com/yt` → youtube.com)
- Protected admin dashboard with create/delete functionality
- Beautiful dark-mode UI using Pico CSS (loaded via CDN)
- Password protection stored securely in KV
- Zero external dependencies – runs on Cloudflare’s free tier
## Prerequisites
- Cloudflare account (free tier is sufficient)
- Wrangler CLI installed
```bash
mkdir linkshorter && pushd linkshorter
mkdir src && pushd src && nano index.js
npm install -g wrangler || npx install -g wrangler || sudo npm install -g wrangler
#Logged in to Cloudflare via Wrangler
wrangler login
#Step-by-Step Setup Guide
#1. Create a strong password to login in (note its stored in plain-text session cookies after login)
wrangler kv key put admin-token 254Bit_3ncryption --binding LINKS
#for boutside local developement use
wrangler kv key put admin-token 254Bit_3ncryption --binding LINKS --remote
cd my-link-shortener
#Choose JavaScript when prompted (not TypeScript).
#2. Create a KV namespace
In the Cloudflare dashboard:
Go to Workers & Pages → KV → Create namespace
Name it e.g. short-links, LINKS or something eaasy to remember
After creation, copy the Namespace ID
#3. Configure wrangler.toml
#Edit (or create) wrangler.toml in your project root:
name = "my-link-shortener"
main = "src/index.js"
compatibility_date = "2026-19-03"
kv_namespaces = [
{ binding = "LINKS", id = "YOUR_NAMESPACE_ID_HERE" } # ← paste your Namespace ID
]
#Replace YOUR_NAMESPACE_ID_HERE with the ID from step 2.
#4. Set the admin password (secret token)
#Choose a strong password and store it in KV:
wrangler kv key put admin-token "YourStrongPasswordHere" --binding LINKS --remote
#Use --remote so it writes to the live Cloudflare KV (not just local).
#5. Add KV binding in dashboard (recommended safety step)
#In the Cloudflare dashboard:
Go to your Worker → Settings → Bindings → KV Namespace Bindings
Click Add binding
Variable name: LINKS
Select your KV namespace from the dropdown
Save
#6. Add the Worker code & Deploy
#Replace the contents of src/index.js with the complete working code (the final version with absolute redirects, error handling, and Pico CSS UI).
#Then deploy:
npx wrangler deploy
#your link shortener is now alive
#7. Using it
Go to /admin → enter your token (the password you set in step 4)
Create, view, and delete short links from the dashboard
Admin login screen example
Dashboard with short links table
Optional Next Steps
Add a custom domain (e.g. go.yourdomain.com) via Workers → Triggers → Routes
Track clicks/analytics by storing counters in KV
Implement link expiration dates or one-time-use links
Move the project to GitHub for version control and collaboration
Built With
Cloudflare Workers
Cloudflare KV
Pico CSS (via CDN)
Happy shortening!
Questions? Open an issue or reach out info@diyregistry.com
Last updated: March 2026